skip to main |
skip to sidebar
The first step in building a framed drift boat is building the ribs and right away we started discovering the problems with the plan (or lack thereof) that we'd bought.The plan doesn't give the angle that the upright part of the rib attaches to the part that runs along the hull. You have to draw a full-size pattern on kraft paper for each rib to calculate the angle manually based on the dimension.Talk about freaking lame! The one piece of info that would have made building the ribs about a one hour job is missing, so then it becomes a 4 step process taking about half an hour per rib. Measure, draw 1/2 the rib as a full size pattern, finally you get the angle because you can measure it on the pattern, then you can finally build the rib. BTW, I know I could have measured the angle off the blueprint, but how do I know the blueprint of each rib is drawn to perfect scale such that it's reliable? As it turns out, it wasn't so good thing I didn't go this route. Jeff and I built the ribs in one day back in March. I'll add some photos of the construction details.A quick word on the choice of wood for the boat. We're using premium pine for the all the rib parts and that's almost 100% down to two factors: Cost and availability. I know there's better, more naturally waterproof choices like spruce, fir, cedar, etc, but they are easily 2 times or more the cost. Also there's the problem of lumber availability these days. Try finding a 12 or 14 foot cedar that isn't full of knots. In your average lumberyard or Home Despot it just isn't happening these days. Years ago, I can actually remember helping my dad resaw construction lumber to make boards because the lumber was so good back then you could get away with that. In my garage I've been saving some 16 foot 2x4 boards that I found at an auction sale. They are true dimension, clear spruce with not one single knot in any of them. That kind of lumber is almost non-existent these days unless you have direct access to a mill.Here's a couple of detail shots of the rib construction as seen after the boat was attached to the strongback.The half-lap joints. All fasterners are stainless steel or silicon bronze and the glue is polyurethane so it's waterproof:
 And here's a picture of the boat as it stands today:
 We decided to do half lap joints on each rib instead of just laping the wood and driving in screws. I think the half lap joint in the picture looks better and produces a stronger joint.
Let the sawdust fly.I did as much research as I could to select plans, but there's not a great deal of information on the net specifically about building drift boats. The hardest thing wasn't finding places to buy plans, the hard part was trying to verify if the plans were any good.Also, most sites that sell plans don't give you a good look at the plans before you buy. This makes it really tough to evaluate plans for their ease of construction. My critera for the drift boat were pretty simple. It had to be:- Easy to build (and verifiably so)- Big enough to comfortably fish 2 with a 3rd person rowing.- Small/light enough to drag over sand flats and possibly rope or drag it around rapids if necessary.- We didn't need big whitewater conquering capability, instead it was more important to have a boat that was light and easy(ish) to row. We ended up with plans from Spira International for their 14 foot Canadian drift boat. Now for those of you who just clicked that link, I don't want to get into the frame vs stich and glue debate. As I wrote, it was very difficult to get good info on just how easy it was to build a given plan. Even worse, very few guys have built boats using both methods so they could give good info.So basically we picked the Canadian because it fit most of the criteria, and in my mind at least, it was easier to visualize how we'd build it based on what the made available on their website I bought the plan and downloaded it. Um, yeah. Let the fun begin. The "plan" from Spira is 6 sheets of drawings and about 4 pages of "instructions". Note that the instructions are generic instructions for any of the dozens of boat plans they sell, only portions of them are specific to the plans you just bought. Right away, I found several errors in the plans, basically dimensions were off on some of the parts listed. eMail me if you want details, but safe to say, getting the plans didn't exactly inspire confidence.But press on, press on, press on. First step, build the ribs.JMH
I'm doing some retro-active blogging to get up to present day, so a little more background. First, the characters in this tale:Jay - I'm your humble host. I'm a lifelong Minnesotan and some of my earliest memories relate to fishing because I grew up on the banks of the Mississippi River. I remember with great fondness trolling plugs on the wingdams of the river and wearing those ungodly big orange horse collar life vests.For some reason, I developed an interest in fly fishing at the age of about 11 which makes me a bit of a black sheep because if my family had a motto, it would likely be something like "If you can't back-troll for it, it's not a fish." I mean, that'd be in Latin, obviously, but that's what it would translate to. Now I prefer to fly fish whenever possible. I fish trout, steelhead, and a highlight of my sporting life has been catching an Atlantic Salmon on the River Spey in Scotland. But I get sick of trout fishing when it gets really hot and weedy in the summer, so I switch to largemouth and smallmouth bass, fishing with both the fly and gear.Jeff - Apologies, Jeff, for writing your bio for you. Jeff grew up just north of the Twin Cities and he's a Minnesota Finnlander to the core. Jeff is an avid angler mostly fly angler for trout, but also he likes to fish gear for muskies and pike. He's also a Nordic skier, cyclist (road and mountain), so basically he's in annoyingly good shape. He's also a good wildlife photographer and he's made several trips to photograph Sandhill Cranes during their migration through the Platte River. I'll see if I can get him to post some pics.One final note, some think Jeff bears a striking resemblance to the late John Denver in some photos. I'll post a comparison later. Next up: We get started on the drift boat.
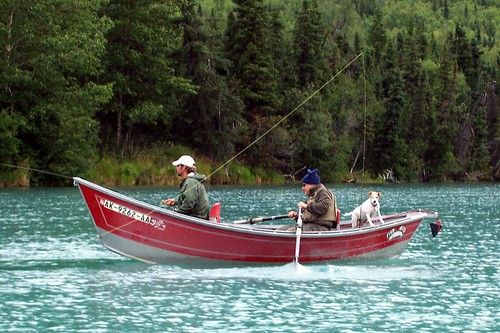
Some brief background on this drift boat project. If you know much about trout fishing, you'll know a drift boat is a dory-style rowing boat designed to provide a stable fishing platform and most importantly, they can safely run shallow rivers and boulder-strewn rapids. Every fly angler knows that there's a fine example of a drift boat in the picture just to the right.  So this story starts the way a lot of fishing mis-adventures start. Stop me if you've heard this one before. A fly-fishing buddy and I were sitting in a bar having a few and we started talking about the miles and miles of great smallmouth bass fishing rivers in Minnesota and Wisconsin that are practically unfished. If only we could find a way to comfortably fish these long stretches of prime water. Blah, blah, sure we'll have another round, etc, etc. You can see where this is headed.Now we could use a canoe. And we certainly have. However, the more we do it, the more unappealing it gets. If you've ever spent a day trying to fly fish out of a canoe, you'll understand that basically it sucks. Only one guy can fish, the canoe is hard to maneuver, blah, blah, take it from me I've done it a lot and it sucks.So there we were having a few beers and mulling over the problem and I said it: Hey, we should just build a drift boat.And so from that simple flash of inspiration (or whatever), the adventure began. So with no previous boat-building experience, I'm building a 15 foot wooden drift boat in my garageSo that's what this blog is about. Hey, how hard can it be?
Jay